The Basics of Graphics for Web Use
The file size of an average web page will consist of 70-80% graphics, 10% text, and the remainder HTML tags and underlying code. Since the majority of every web page size is made up of graphics and images, understanding how to properly crop, size, and compress graphics for use on the web is a necessity for having a clean, fast loading, web page. Using properly cropped, sized, and compressed graphics can make the difference between a pleasant user experience and having your visitors leave your web pages before they explore your content.
Choosing the Proper Graphic Format
There are 3 basic graphic formats which are used for web graphics
JPG Image Format:
JPG or JPEG is short for Joint Photographic Experts Group. I don't want to go into detail about the origin of this graphic format and all the technical details about a lossy compression format so what you should remember is that a JPG format is usually used for photographs which have many shades of color. The JPG format supports 16 million colors. If you have a photograph you want to put on your web pages, JPG format is the one you want to select when you save your image file.
GIF Image Format:
GIF is short for Graphic Interchange Format. A gif image can have up to 256 colors so it is best for saving drawings, backgrounds, and simple graphics. This format is best used for graphics and not photographs which can have thousands of colors. GIF images can be transparent which can come in handy if you want a graphic overlayed over a complex multi color background such as a photograph. GIF images can also be made up of several "frames" which show animation.
PNG Image Format:
PNG is short for Portable Network Graphics. PNG format allows for more compression then GIF format without detail loss so the same image can load faster if saved in a PNG format over a GIF format. PNG format expands upon the transparency found in GIF images by allowing for more control over the opacity of an image. PNG format does not support animation like GIF format does. PNG is not supported by some older web browsers.
Summery |
Format |
Use For |
Do Not Use For |
JPG |
Photographs
Screen shots of videos/images
Low contrast high color images
Images with gradient edges |
High contrast photos (B&W)
Line drawings
Simple graphics
|
GIF |
Animated images
Line drawings
Simple graphics |
Images with gradients
Photographs
|
PNG |
Line Art/illustrations
High contrast photos (B&W)
Transparencies
Application screen shots
detailed diagrams |
Low contrast photographs (color)
Animated graphics
|
Your image editing software should allow you to switch between several file formats during the save process. You can examine how your graphic is handled by each format as far as the file size and load time required for each file format type. Select the format that gives you the smallest file size with the best quality image.
The above descriptions are very abbreviated explanations and not intended to be all encompassing. If you want to learn more technical information about these web graphic formats you can search the web for more in-depth explanations of each file format. For this tutorial what is needed to know is to use the JPG format for photographs and the GIF or PNG format for simple graphics.
Working With Your Web Images
All images you use in your web documents, regardless of which format you are using, should be created and manipulated within a dedicated graphic editing program. The source of the image is unimportant, whether it is a digital camera image, a scan from a scanner, or something someone has sent to you in an email. You will almost always need to manipulate the image in a graphic editing software to make it suitable for use on the web.
There are 3 basic element to creating web graphics. You will have other tasks besides these three such as color correction, etc but these three basic tasks will usually need to be performed on every image you create for the web. These 3 tasks will be discussed in the order in which you will preform them:
Cropping an Image:
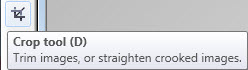
All graphic editing software have provisions for cropping an image. Cropping is the process by which you select a portion of an image and "crop off" the parts you do not want to show. The universal icon for the crop tool in most software is dual angles or scissors. You typically select the crop tool, draw a rectangle containing the portion of the image you wish to retain, then tell the software to crop the image to the area you have selected.
Smart Saver Pro Crop Tool |
Photoshop Crop Tool |
Corel Crop Tool |
 |
 |
 |
After you have your image cropped to contain only the portion you wish to show you can move on to the next process in creating images for the web.
Sizing an Image:
There are 2 definitions for the size of an image. The physical image size (height x width) and the file size of the image. The one we are talking about in this section is the physical size of the image (height x width).
All graphic editing software will have provisions for resizing an image to a set height or width. You will always want to keep the aspect ratio of the image so that you do not distort (stretch or squash) the image when you change the height or width of the image.
You will always want to pre-size your image before you use it in your HTML authoring software. You need to determine where you want to use your image then decide how wide or how tall the image needs to be in order to fit into the location you want to use it. If you find that your image does not fit within the location where you want to use it, you will need to open the image in your graphic software and re-size it again. It is a good web design habit to have both your HTML authoring software and your graphic editing software open at the same time so that you can quickly re-size an image if you find that it does not fit where you want to use it.
Compressing an Image:
Image compression controls the actual file size of an image (how large or small the finished image file is in kilobytes). Your goal when compressing images for use on the web is to end up with the smallest file size without losing image quality. The smaller the image file size, the faster the image will load on your web pages.
Image compression for GIF and PNG-8 involves lowering the number of colors used. To save a smaller file size image drop the number of colors used from 256 down until you see the image start to degrade, then go back up one step. You do not need 256 colors in a B&W drawing that has only 2 colors (black and white). Saving a B&W at 2 colors will produce a smaller file size than saving it at 256 colors will.
You want to compress a JPG image as much as possible without losing detail or introducing artifacts (blurriness, pixelation, fussy edges). All image editing software will have a split screen view to help you decide how much compression you can use and show you when you have gone too far. The spit screen will tell you the file size of the compressed image and some software will even tell you the time it will take to load the image in seconds at various bandwidth rates. You should try to keep all of your images no larger than 125k in size (for a full screen image) and no larger than 25-50k for an inline image which is wrapped with text. The larger the image is (height x width) the more compression you may need to apply in order to get an image that will load fast but still be clear. The correct amount of image compression you need to apply is a compromise between file size and image clarity and can be different from image to image.
Having images that are not compressed properly will cause your web pages to load very slowly so that your site visitors leave before your pages display. Improperly compressed images may also cause you to go over your hosting bandwidth allotment which may incur additional hosting charges or get your website suspended by your web host.
Proper image compression is a very important part of web design.
This tutorial is provided as a basic guideline only. To fully understand how your graphic editor works you should consult the user's guide for your product.
|
Did you find this tutorial useful?
Do you want to keep this resource online?
Make a donation to keep gotFusion alive
This page was written by and is maintained by turtle
|
|


