|
In order to avoid changing your web site styles that might be shared between site projects you should always make a duplicate of the stock site style that came with your product before you start any site project. You should do this for every web site project you work with.
By working with a unique site style for each project you will avoid accidentally making changes to existing web site projects that might share the same style that you are changing. A good habit to get into is to create a duplicate style based on a stock one before you begin and name the new duplicate style the same as your web site project so that you do not accidentally make changes to it later on.
NetObjects Fusion 7.5, 8, 9, 10, 11, and 12
- Go to style view
- Find a style that you like
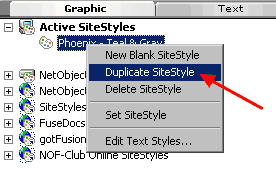
- Right click on the style
- Choose duplicate style
- Rename the style to reflect the name of the nod.
- From the tool bar select Set Style to apply the new style to your site project

NetObjects 7 and earlier
- Go to style view
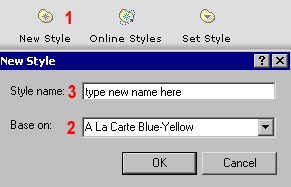
- Click new style
- Select a style to base it on
- Ttype a name for the new style
This will protect the original style from being modified. I always name the new style the same as the site itself.

 Set the new style as the default for your web site project by pressing the Set Style icon in the tool bar Set the new style as the default for your web site project by pressing the Set Style icon in the tool bar
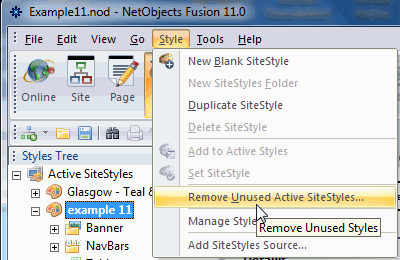
After you have set your new style to be the current active style you can clean up any other styles that are in the Active Styles folder that are not being used. To do this from the menu select Style then select the drop down option Remove Unused Active Styles

|
Did you find this tutorial useful?
Do you want to keep this resource online?
Make a donation to keep gotFusion alive
|
|