|
Disclaimer: Some of what I'm saying here is purely personal opinion. If you don't like my recommendations, that's fine, feel free to experiment.
General tips:
- Use no more than 12 images per photo gallery. Twelve or fewer thumbnails keeps the total file size of your Thumbnails page reasonably small for acceptable user download times.
- You can put many more images into a PhotoGallery, but when doing so, use a text link instead of set of thumbnails to open the gallery. To set a text link:
- Open the Photo Gallery Properties Editor.
- Click the Thumbnail Page tab.
|

|
- In the Format section of the tab, click the Text link radio button.
- In the box, type the text you want to link. If you don't enter anything, the linked text will be the name you gave your gallery when you created it.
- The text link will appear on the page.
|
- Click the Photo Page tab to set up your photo pages, or click Done to close the editor.
|
Download times
In each of the Photo Gallery configuration tabs, Fusion displays estimates of how long your page will take to download. Always keep in mind that these times are accurate only in ideal network conditions, not in real use on the Internet.
Top of Page
Setup Time-saver: Place all your gallery images in one directory
When all the images for a Photo Gallery are in one directory, you can save a lot of mouse clicks over adding images one at a time. Here's what you can do when adding images:
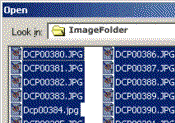
- In the Open dialog, navigate the Look in box to the directory where your images are stored
|
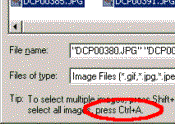
- Press CTRL+A to select all, or select just a few with Shift+Click or CTRL+Click.
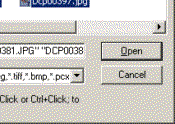
- Click Open
|
|
|
See, wasn't that faster than adding images one at a time?
Top of Page
|
Formatting Title and Caption text
If the the text size, font, etc. you set up in the Photo Gallery properties for your photo Title and Caption text are not showing up when you preview or publish, the reason is simple. The Title and Caption boxes are just text objects, which inherit the CSS formatting from the site style properties.
- Setting explicit values for Font, colour, size, etc. in Style View's text tab for either Body or Normal (P) will cause that formatting to appear in the photo or thumbnail pages Titles and Captions.
Workaround #1:
- Set up a custom text style (Page View, Text, Edit Text Styles, New) for your caption and title text.
- Open the thumbnail page and the "stacked" photo page.
- Double-click to select all the text in the title or caption
- In the Text Properties dialog, assign your Caption style or Title style to the text.
You will have to do this for each thumbnail image Title, and for the Title and Caption on each of the "stacked page" photo pages.
- Time saver tip: set up the Title to appear not in the photo page, but in the photo page banner. If you do that, only the Caption needs to get explicit formatting in the Photo Gallery pages.
Workaround #2:
- In Style View, Text Tab, remove all explicit formatting from the Body and Normal (P) text objects.
- In Page View, create a new Text Style (as in step 1 above) for your normal paragraph text.
- Apply this style to each paragraph in your site that you want to use that formatting.
Neither of these workarounds are great time-savers, but they will work.
Top of Page
Thumbnail Properties
Make sure thumbnail file sizes are not too big
- At high quality, images are 5 kilobytes. If you have 12 thumbnails, that's more than 60 kilobytes for users to download.
- At medium quality, the thumbnails shrink to 1.5 k, for a total of 9k - a much more reasonable download.
Keep it simple
The default thumbnail frame decoration (the Film setting) is attractive, but it (and the Slide setting) has two disadvantages:
- It decreases the viewable area of your thumbnail images
- Pictures in "portrait" orientation (taller than they are wide) will come out much smaller to fit inside the always-landscape mode slide or film template.
My recommendation is to use the Simple Border around the thumbnail, or even no border (a Simple Border set to 0 pixels).
Don't let the thumbnails make your page too wide
If you design your site to work well in a browser at 800x600 screen resolution, and use a vertical nav bar in the left master border, you need to do some math.
Maximum total width of your page should be: 790 pixels, minus the width of your left masterborder. Adjusting the thumbnail size, distance between thumbnails, and the number of thumbnails per row give you many options to juggle to meet this goal.
Top of Page
Photo Page Properties
Keep it Simple
The decoration options in the Photo Page properties tab are OK, but they do add to the download size of the page. Like the options for thumbnails, these extra borders around the photo can distract interest from the actual image.
The Simple Border set to 0 pixels results in maximum area for your image.
Check alignment
By default, Fusion places your photo images aligned with the left edge of the layout in the "stacked pages." You can adjust the placement of the image.
To re-align the image, click it to select, use Arrow keys or Shift+Arrow to move the image. You can also do this with the Caption and Title text boxes.
To adjust the navigation button positions, select all the arrow buttons by dragging a box around them. When selected, use Arrow keys or Shift+Arrow to move them as desired.
Changes you make to alignment within the page affect all the pages in the photo gallery.
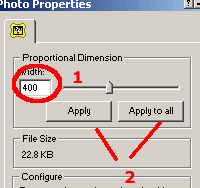
Check image size
- To adjust the size of the image, use the slider widget, or enter a number in the Width box.
NOTE: Adjusting the width property of a Portrait-oriented image behaves unexpectedly if you do an Apply to all
- The width setting does not set the width. The label Proportional Dimensions tells us this tool actually sets the overall percentage of size adjustment vs. your original image.
- Therefore, it is probably best to adjust Portrait images individually. Once you know your desired width in pixels, you can copy that number to the clipboard, and paste it into the Width box for each portrait mode image in the gallery..
|
|
- For Portrait mode images, use Apply instead of Apply to all.
|
The table below illustrates what the Photo Gallery Proportional Dimension width tool actually does in a situation where you do an Apply to all for images you want to be 400 px wide:
|
|
|
|
|
Set Portrait image width to 400, or 52% of original, Apply to all result is:
|
400x533 = just right
|
533 x400 = too wide!
|
|
Set Landscape image width to 400, or 39% of original, Apply to all result is
|
300x533 = too narrow!
|
400x533 = just right
|
Top of Page
Raw material (Your original images)
The ancient computer acronymn: GIGO (garbage in, garbage out) applies as well to Fusion 7's Photo Gallery in year 2002 as it did in the dim dark past when computers ran on processors built with arrays of vacuum tubes. If your source images are:
- Saved in the wrong file format and/or with the wrong settings
- Out of focus or blurred by motion
- Show poor contrast and brightness, or are off colour (gamma)
- Too much bigger or even a little smaller in pixel dimensions
you will have problems not of the tool's making. GIGO. We'll discuss most of these points below.
General rules of thumb
Source image file formats
- Photographs should always use the JPG file format for web output - so use that option when you set up the Photo Gallery thumbnail and photo page items.
- For maximum quality, original source images should be in uncompressed TIFF, JPG, PNG, or BMP format at the maximum number of colours you can get from the source scanner or digital camera.
Source image size
Bigger is not better and smaller is always bad. The Photo Gallery tool is much better at "shrinking" a file to a smaller screen dimension than at making it larger.
The reasons for this are more complex than I am qualified to discuss, but common sense tells me this:
- Making a larger image smaller is relatively easy for software to do, because you are removing unwanted data (pixels) from the source. You lose relatively little detail if you shrink an image by less than 50% in pixel dimensions.
- At a 75% reduction in size, you are throwing away far more data than you are keeping. Detail will suffer, but you might not see it in some images.
- Making an image larger forces the software to "guess" at the values for missing data pixels. Even adding as little as 5% to the dimensions of a bitmap image degrades its quality in an immediately visible way.
The better your graphics, the better the results
Graphics beginner?
If you are new to the world of image editing, don't worry too much about this. The really important things you need are:
- Good quality images
- Larger in size than your Photo Gallery Photo Page image.
If the original looks good on your screen, the chances are the Photo Gallery output will be OK.
Make adjustments before bringing into the Picture Gallery
- In a perfect world, the source images for the Photo Gallery will be exactly the pixel size and file format (JPG at 70-80% compression) that you want for the Photo Gallery Photo pages. Any of many good image editing tools can make this an easy (if somewhat time-consuming) task.
- Do your cropping, editing, dodging, burning, masking, or any of a zillion other verbs for image editing in your favourite tool. Save the output as a high-quality JPG at the right size for your photo page.
- With the images already done the way you want them, just set the Photo Gallery to bring them at their current pixel size and 100% quality. Don't try to compress an already compressed file: taking 75% quality of an image that's already 75% quality results in less than 57% of the quality of the original.
|