Forms Handler Fields Tab

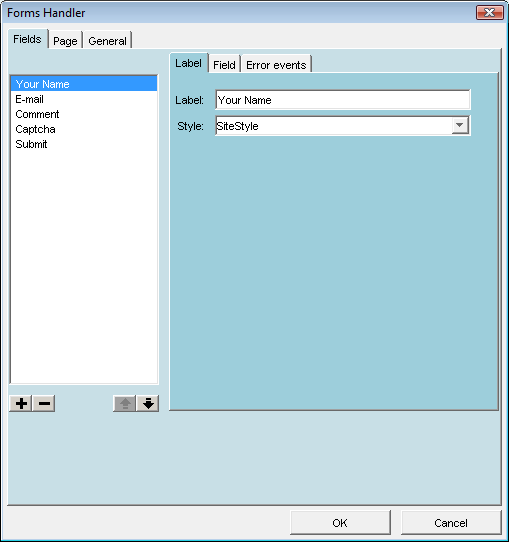
The main Fields tab is where you add/remove input form fields. It is where you set the name that will appear on the web page beside the input field and where you can change the order in which the fields are displayed in the form.
To remove input fields, highlight it, then press the - (minus key) at the bottom of the list of fields
To add input fields press the + (plus key) at the bottom of the list of fields
To change the order that the input fields are displayed, highlight a field then press the up and down arrow keys at the bottom of the list of fields to reposition the selected field up or down.
Label Tab:
The tab within the Fields tab called Label is where you enter the text that is displayed beside the input field highlighted in the input fields list. You can also select a different site style to apply to this input field and text label.

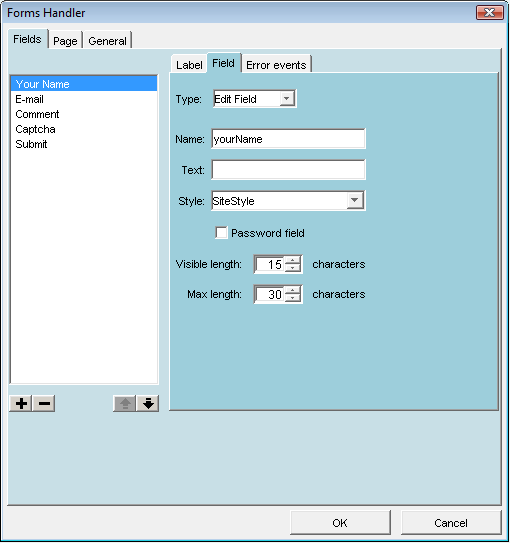
Field Tab:
The Field tab next to the Label tab is where you select what type of input field is associated with the field selected in the fields list. From the drop down you can select any form input field from input box to radio button to text box.
The Name input box is where you enter the form field name you wish to use
Depending on which type of input field you have selected the various options will appear for you to select in order to make your form input fields function; such as default text, selected or unselected radio button, check or drop down box options, visible and max width.
When you select the Captcha input field you will be able to set the appearance, length, background color, character colors, number of characters, and spacing of the captcha image. A Captcha is a graphic of text that the visitor must enter in order for the form to be submitted
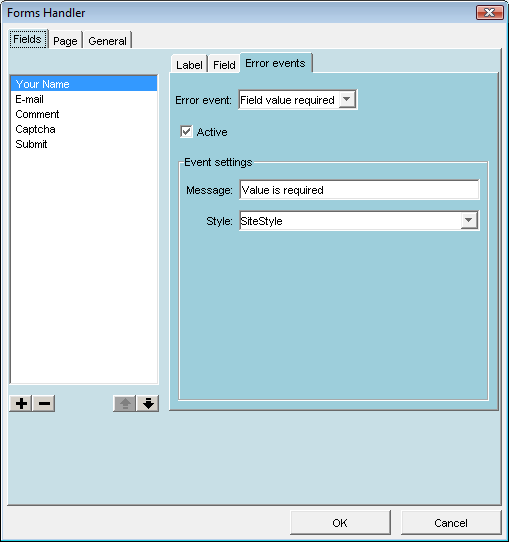
Error Events Tab:

The Error Events tab is where you set how input errors for each input field is handled. You can make input fields required, you can set a minimum number of characters or a maximum number of characters and display an error message on the form when these criteria are not met by the visitor filling in the form.
To toggle the error reporting off you remove the check from the Activebox
All input fields except for a submit and clear button can be made required entry fields
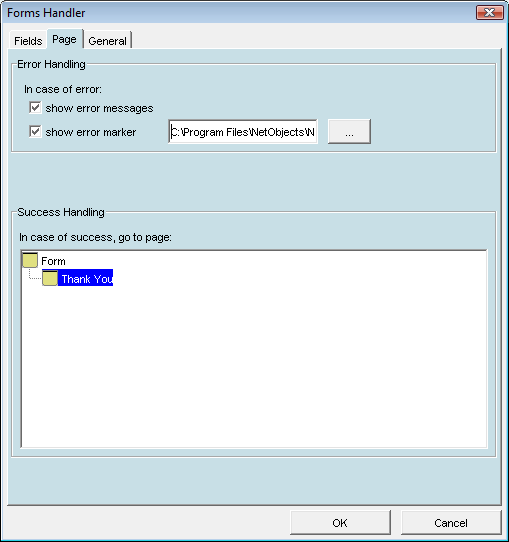
Forms Handler Page Tab

Error Handling:
If you have selected to make some form fields required you must check the Show Error Messages check box (default is checked). When a required field is left empty the error message you set in the Fields tab > Error Events will be displayed and if the Show Error Marker check box is checked a red triangle along with the message will be displayed and the form will stay in the visitors browser window
Success Handling:
Select a Success Page from the web site tree to display to the site visitor when a form is processed without errors and an email is sent to you.
You will need to create your success page in Site View. You should put a little thank you for contacting us text on the page so that your visitors know that their inquiry or comments have been sent.
Continue on to next page of the Forms Handler tutorial --->
|
Did you find this tutorial useful?
Do you want to keep this resource online?
Make a donation to keep gotFusion alive
This page was written by and is maintained by turtle
|
|