|
Most hosts store cgi scripts in a separate directory than eh rest of your site. Many even provide you with popular cgi scripts that have been customized or written to run specfically on that hosts servers.
You can link into these cgi scripts or you can link to a secure authorization aera without having to restrict your entire site.
How? By creating "Aliased" Folders. An aliased folder is a method for you to "nickname" a physical address on your server and refer to that location thru the nickname instead of the actual address.
Creating an Aliased Folder requires two main steps
- Defining the physical location on your server where you want to place your page and related assets
- Define the URL "nickname" you want NOF to use to refer to that physical location
Defining a CGI Directory
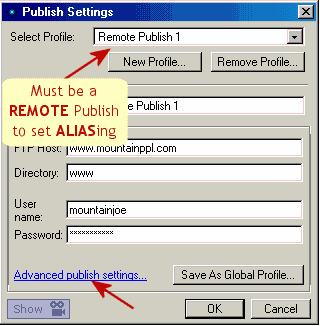
In Publish View, select "Publish Settings" on the tool bar. Be sure your publish is set to "Remote".
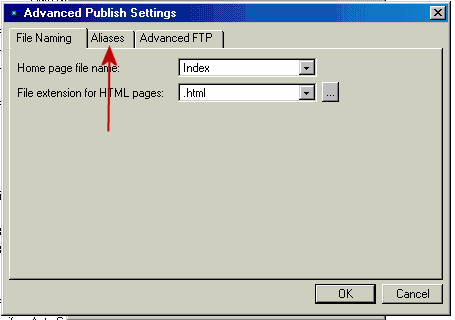
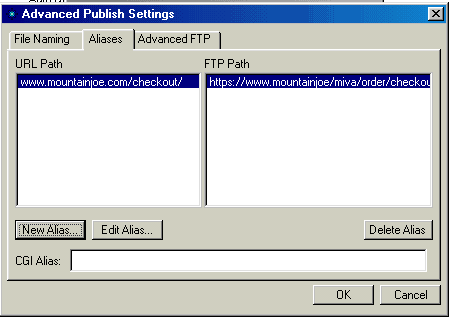
Click "Advanced Publish Settings" and then select the Aliases tab.
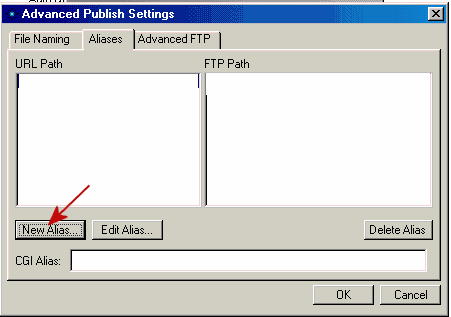
Enter the physical FTP where the CGI scripts are stored in the "CGI Alias" field and click OK. The CGI-bin alias is now set.
Defining Other Alias Directories
In Publish View, arrange your directory structure the way you want your site to view it. If you will have a protected directory that you are creating the alias for, then make that folder and move all the files and assets to be protected (or hidden) to that new folder.
NOTE: You server must be configured to support you alias. This is not an NOF function, and must be done by your host's system administrator if your site doesn't currently support aliasing. Contact your technical support for more information.
Select "Publish Settings" on the tool bar. Be sure your publish is set to "remote".
Click "Advanced Publish Settings" and then select the Aliases tab. Click the "New Alias" button.
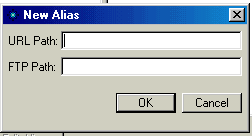
Enter the absolute path from your site's root folder to the newly created folder you want to be aliased in the URL path
Enter the actual FTP path for the folder in the FTP path.
NOTE: Remember the FTP location MUST been the same server as the rest of you site since you server profile can only log onto 1 server at a time.
Updating or Deleting Aliases
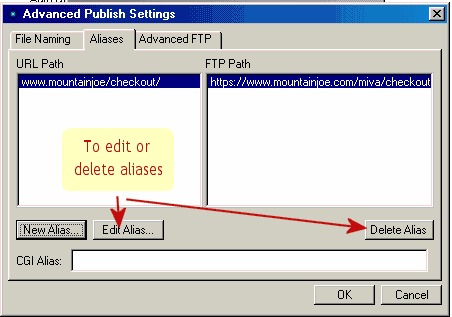
Once you have created an alias, you can update or delete that alias by selecting the "Edit Alias" or "Delete Alias" buttons on the Aliases tab
Next Lesson - Advanced FTP settings
Did you find this tutorial useful? Would like to view all of our tutorials and support pages?
Join the NetObjects Fusion Users Group Community
|


